
Cleaning the Peacemaker
First, make sure your pistol is unloaded and in a safe condition. Next put your hammer in the half cock position, open the loading gate and place the gun on your bench with the muzzle facing up. With the base pin latch unit pressed to one side, or removed altogether, gently slide the base pin out. If it requires more force than you can provide with your fingers, use our new “Base Pin Puller” (found on our accessories page). Once the base pin is removed, carefully “Slide” the cylinder out being careful not to let the sides of the cylinder touch the frame. The frame is very rough on the inside and will quickly make fine scratch lines on the bluing of the cylinder that will degrade the finish on your Colt. (see photo E)
Photo E
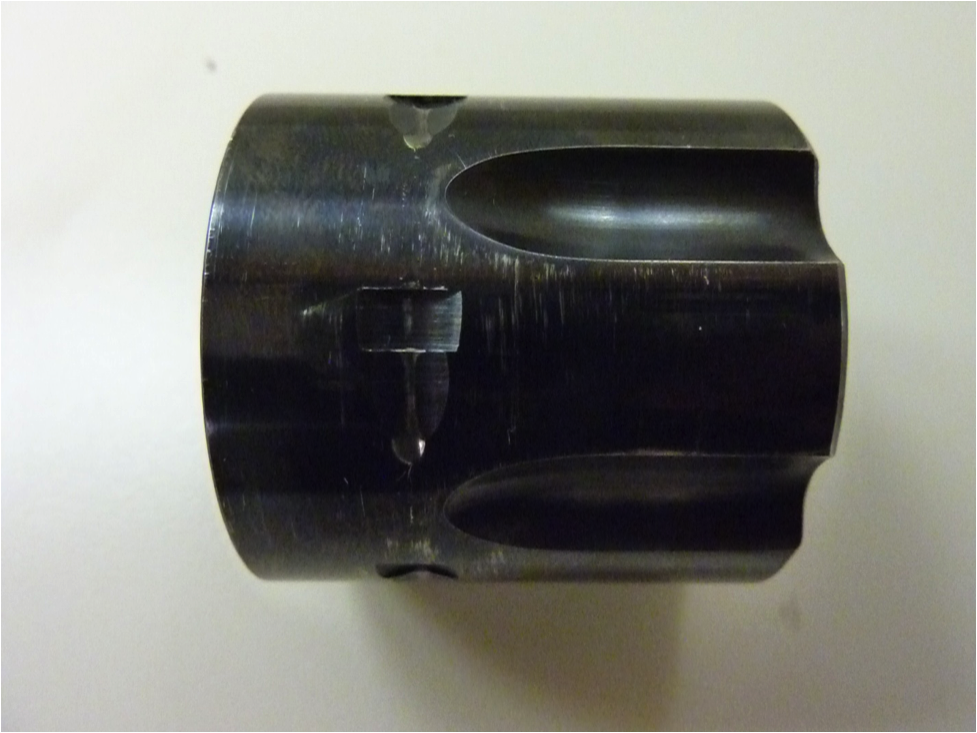
That is why we always point the muzzle up when removing the cylinder. If you do it with the muzzle horizontal, when you remove the base pin the cylinder will immediately drop onto the rough surface of the bottom of the frame window and when you remove it by sliding it out you will scratch the side of the cylinder.
Once the cylinder is out, you can clean the chambers with a bronze brush of the correct size and “Bore Tech” bore solvent or other similar product. I sometimes use a jag with a tight fitting cloth patch soaked in bore cleaner. On some Peacemakers that have been shot a lot you will see what looks like areas on the front corners of the cylinder right where the chambers are, places where it looks like the blue has come off. They will appear gray color and are on the front end of the cylinder. (Photo F coming soon . . .) This discoloration is really just lead deposits that seem to have wrapped around the corner and extend on to the outside of the cylinder.
These deposits are difficult to remove without actually rubbing through the blue finish. They can also appear on a Nickel cylinder, and look just like the Nickel has come off. Years ago I came across a product called “Neverdull” made by Eagle One; it is chemically impregnated cotton wadding. To remove the lead deposits on a Blue or Nickel cylinder, simply take a small piece of the wadding and gently rub it on these areas and you will be surprised how quickly the lead will dissolve. Remember on blue guns rub gently. Once your cylinder is clean wipe off the Neverdull, oil it and set it aside. Next the bore, I like to remove the ejector housing and place the pistol barrel horizontally in a padded vise so I don’t have to hold the gun, but I’ve done it both ways. (see photo G)
Photo G
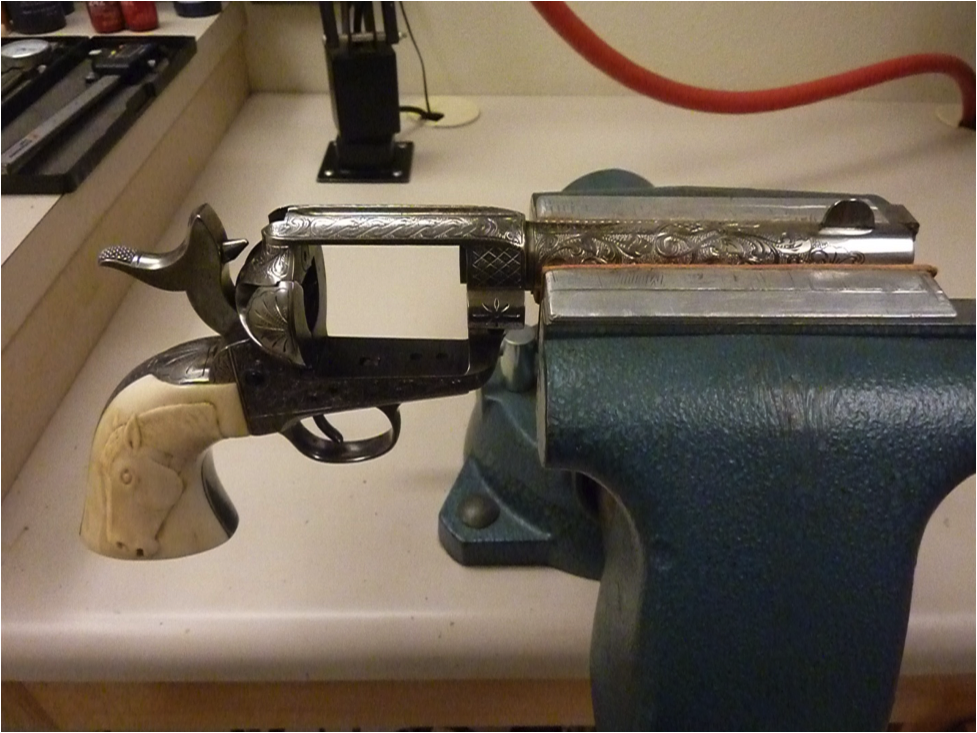
Again use a bronze brush or tight fitting patch with Bore Tech or other similar bore cleaner and get as much lead out as you have the patience for. I don’t use any special lead removing devices as I know a small amount of lead won’t be detrimental to accuracy. Once the bore is done, the only part left is the inside of the frame window. Here I use cloth rags and a stiff nylon brush. Start with the brush and Bore Tech carbon remover. The Bore Tech products are nice to use because they remove the carbon deposits as good as or better than any other products I’ve used. Bore Tech products don’t smell, are biodegradable, and safe on your skin. Brush the area around the back of the barrel, the lower front corner of the frame window and finally the upper rear corner. These are the places that seem to accumulate the most fouling. When you think it’s cleaned to your satisfaction use the cloth wetted with carbon remover and get the rest of it. The bore and carbon cleaners will not protect the finish so be sure to wipe all surfaces with a light film of oil. The last part to address is the ejector assembly. Unscrew and remove the assembly, separate the parts wiping everything down, oil the parts and reassemble. Make sure to check all the screws for tightness, as they tend to shoot loose on most Peacemakers. The trick here is to torque all screws tightly without deforming the heads. I have found over the years that this is best done with driver heads that are custom ground to the exact shape and size of the Peacemaker screws. This is the reason our Peacemaker Screw Drivers are the only screwdrivers you will find on my work bench. Take note, they are a lot cheaper than a new set of screws. Now you can oil the places I outlined at the beginning of this article and replace the cylinder using the same technique I used to disassemble only in reverse order.
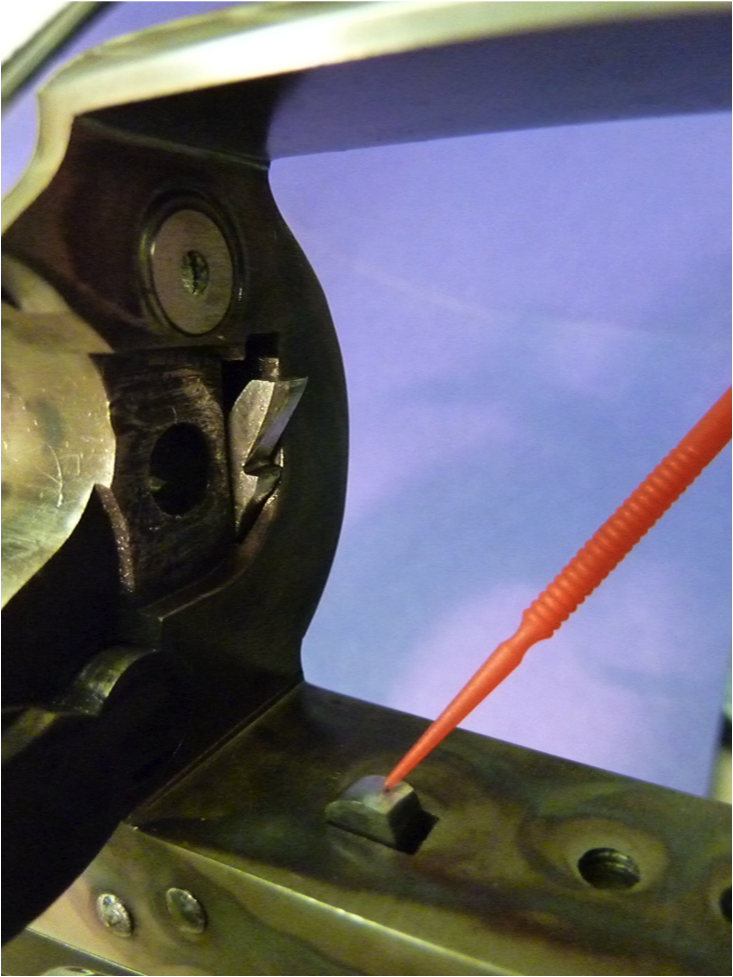
For previous clients who have had our “Gunslinger Deluxe Action Jobs” there are two more steps to check before installing your cylinder. First due to the custom modifications I preformed on your Colt to achieve ultimate reliability and maximum tightness, you may need to manually depress the head of the bolt that sticks up from the bottom of the frame in order to re-engage it with the hammer so that it will drop down when the hammer is in the half cock position.(see photo H)
Photo H
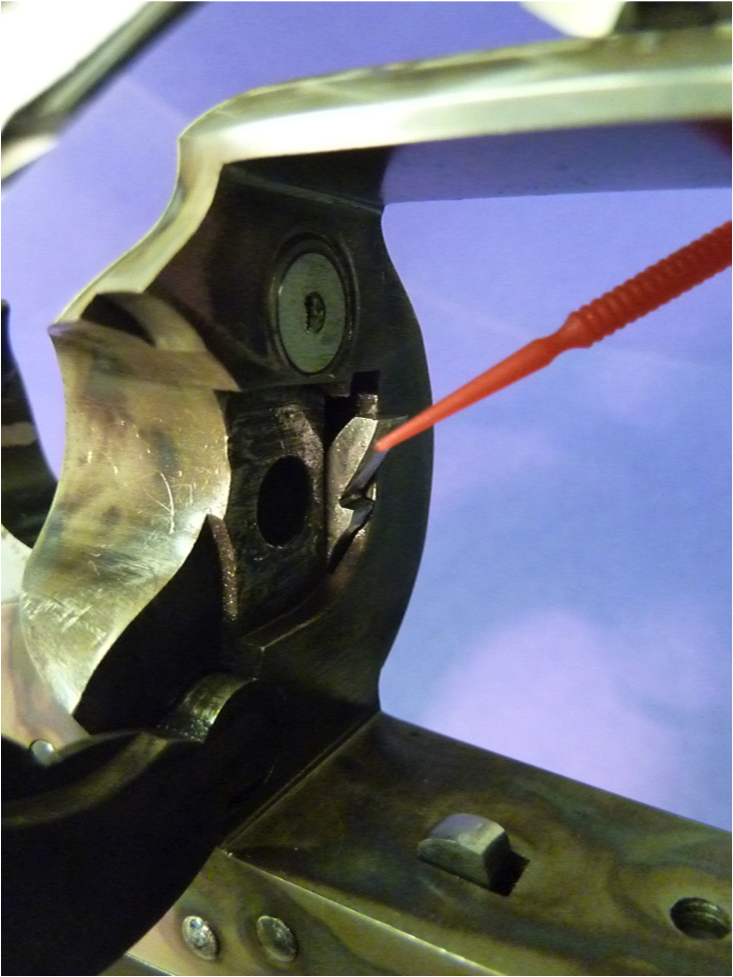
The other part to check is to manually press the hand back into its slot if it comes out too far when the cylinder is removed. (see photo I)
Photo I
Now enjoy your Peacemaker.